Getting Started
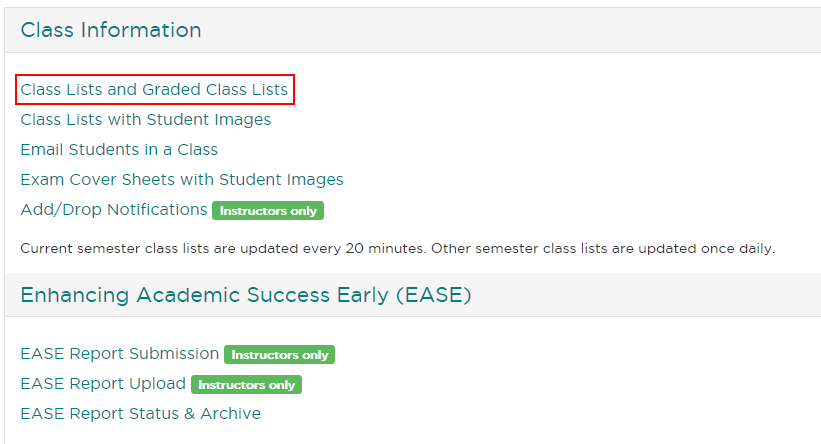
- First, download a class list. To start this process, navigate to the Instructor Systems Menu and select
Class Lists and Graded Class Lists from the Class Information sub-section.
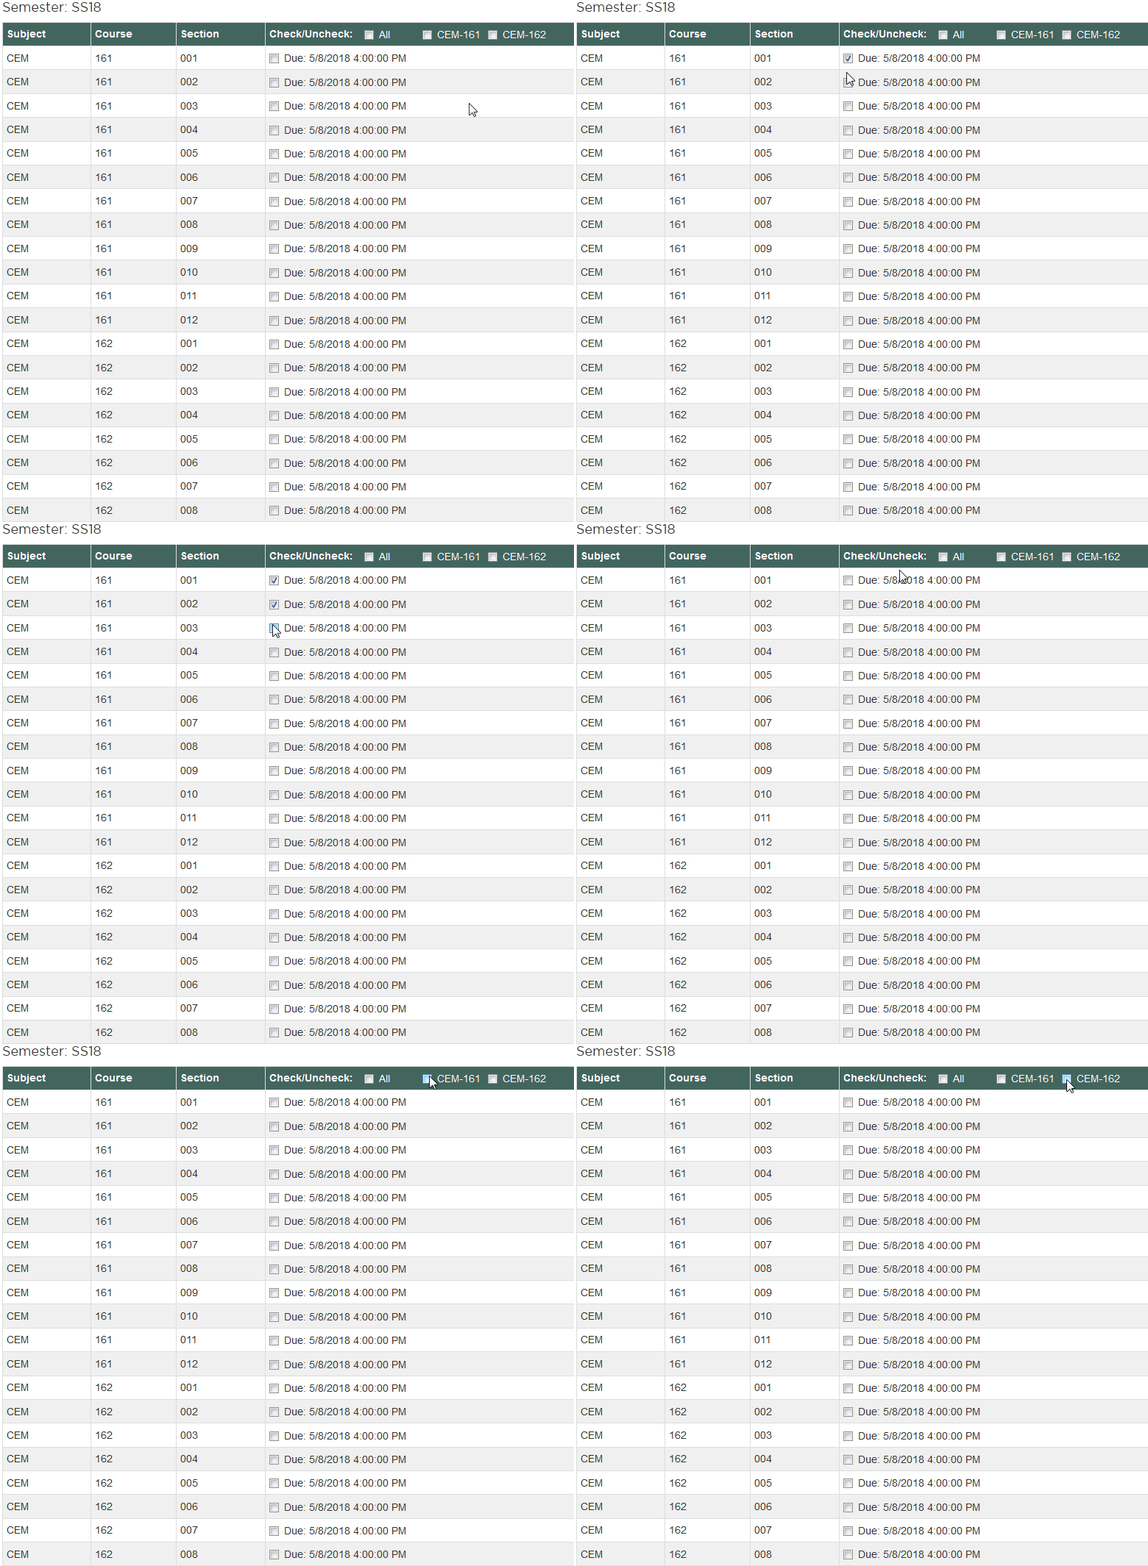
Selecting Classes to Include in Class List Download
- Individually check the course sections to include, or select multiple sections at once by checking the boxes in the
Check/Uncheck: column header.
2. At the bottom of the screen, select the Download button.

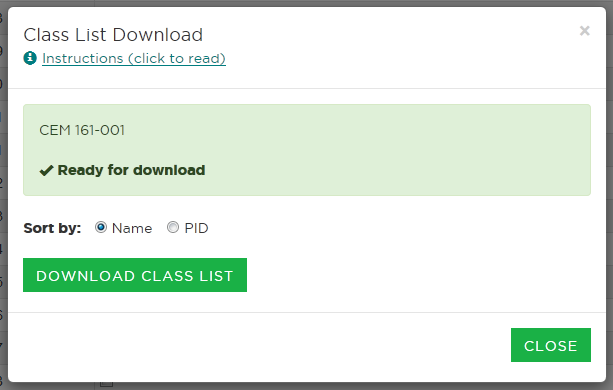
3. Choose to sort your list by Name or PID then press the Download Class List button.
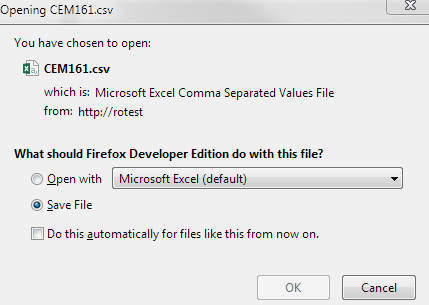
4. If prompted, choose to save the file.
Entering Grades
- Locate the class list file that was downloaded in the previous step. The file will be in a comma separated value (.csv) format and can
be opened with a program like Microsoft Excel.
- Complete the grade column. Save the file, keeping it in CSV format.

Upload the File
- Navigate to the Instructor Systems Menu and select
Grade Upload from the Grades sub-section.

2. Select CSV-Classlist under Select an upload file type and check the section(s) to be uploaded.
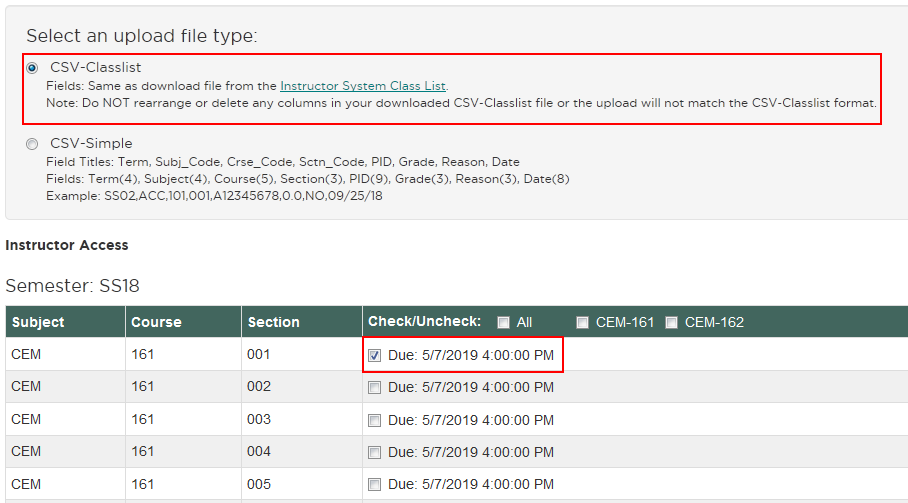
3. Press the Browse button, locate your file, and upload it by selecting the Upload and Complete Grade Report button.

Grade Reporting Form
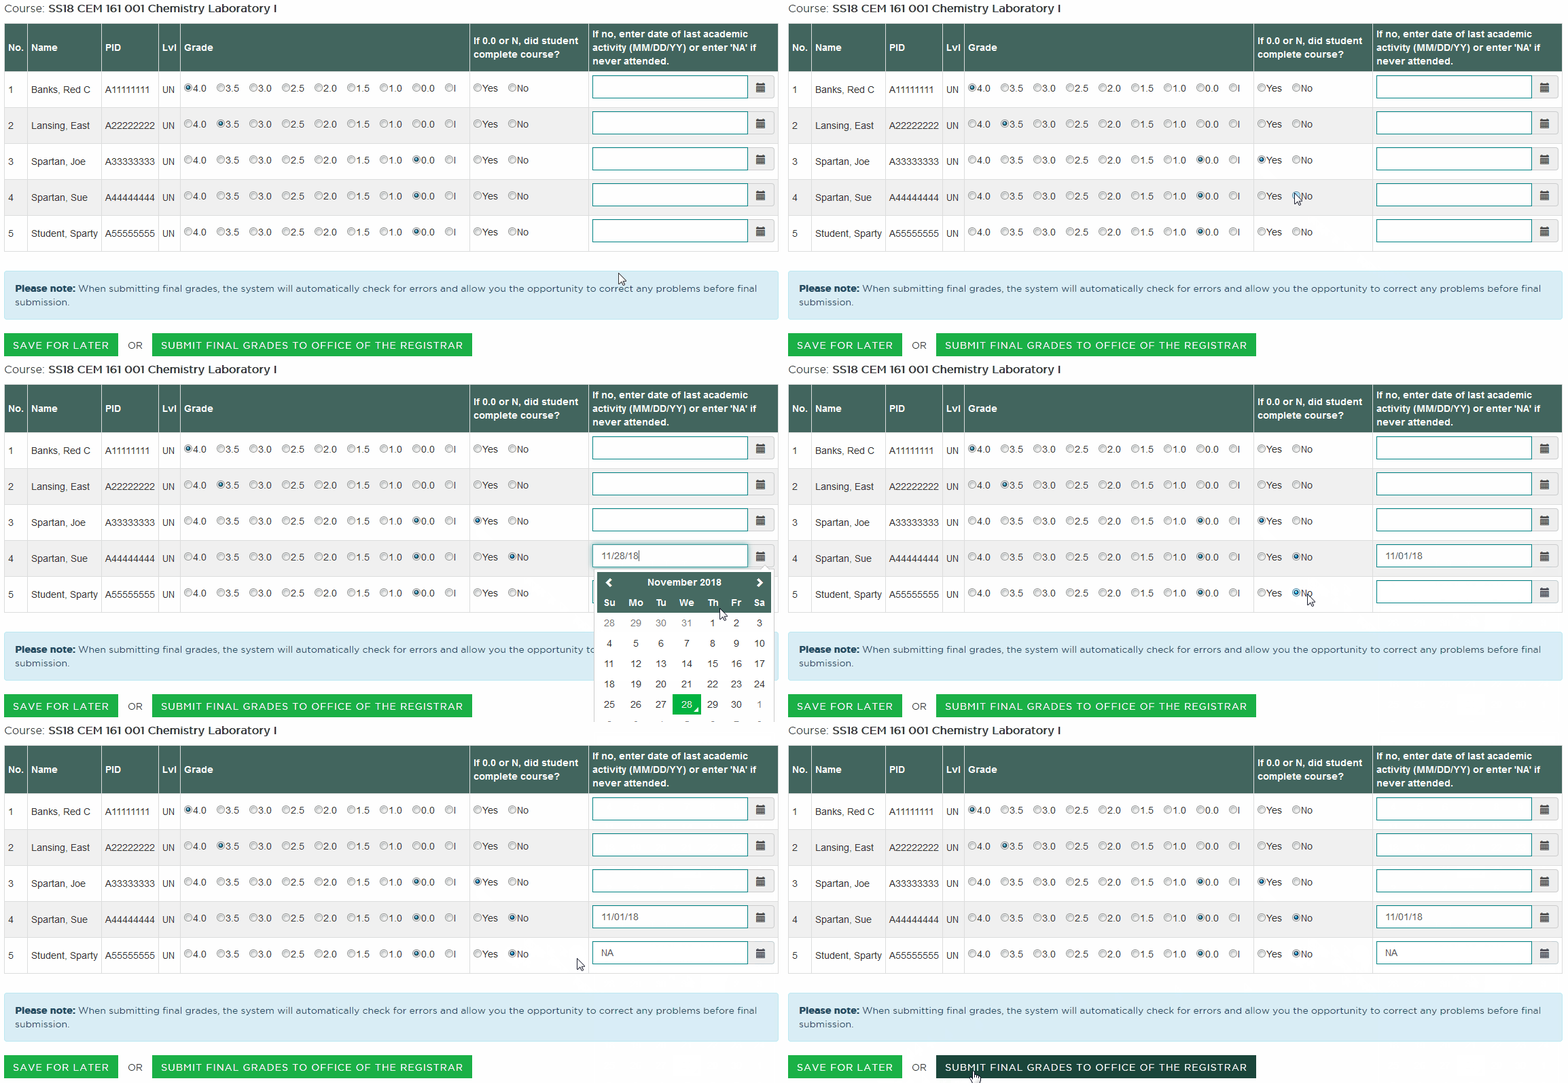
- If a 0.0, F, or N grade is given, indicate if the student completed the course. If No,
enter the last attendance date or enter NA for never attended.
- Grades may optionally be saved for accessing later by selecting the Save for Later button. This DOES NOT submit the grades to the RO.
The Grade Reporting Form can be used to access grades that have been "saved for later."
- To finalize and officially submit grades, select the Submit Final Grades to the Office of the Registrar button.
- There will be an opportunity to correct any errors before grades are sent. Once grades have been sent to the Office of the Registrar, no other changes are possible.
- After submitting grades, wait for the next screen to display. This will either be a confirmation of success or an error report.
- Note: Re-uploading a grade file will replace the previously loaded grades.
Error Reports
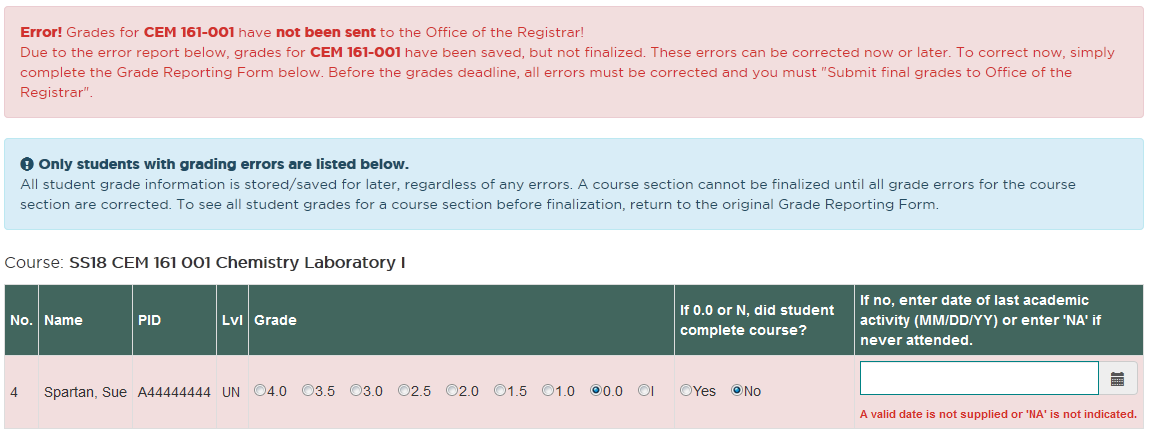
- If any errors are found upon saving for later or final submission, an opportunity to correct them will be given.
- Errors can be corrected immediately or at a later time.
Confirmation
- After a successful submission, a confirmation summary will appear.
- Upon final submission, a confirmation email will be sent to the person who submitted the grades.
- To log out, return to the main menu and select the Log Out button.
As an added security measure, especially for users working in a public setting, please close all browser windows.
- Grades can be viewed in the Graded Class Lists within 1-2 business days.
